

Think you know how to roll a joint? It may look simple, but if you want to end up with something that smokes well and is durable enough to share, it’s a bit more complicated.
Fortunately, learning how to roll a good joint isn’t rocket science; it just takes a bit of practice. And in this guide, we’re going to share everything you need to know to roll tight, consistent, pro-style joints.
How to Roll a Joint: What to Know To roll a joint, you’ll need cannabis flower, a grinder (or substitute cutting tool), and depending on the variation you choose (filter, no filter, king-size, or other style) appropriately sized rolling papers. But within a few tries, you should be able to get the hang of it.
Everything You Need to Roll a Joint
Good technique begins with the right setup. Whether you use upgrades like filters and a rolling machine, or you keep it simple and old-school, here are the tools you’ll need to learn how to roll a good joint:
Essential Tools & Accessories
Besides the cannabis flower itself, you’ll need a grinder, optional filter or crutch material, appropriately sized rolling papers (more on that in a moment), and a lighter or other ignition source.
How Much Flower You’ll Need
This depends entirely on the paper size you choose. To help you plan ahead, here’s a rough guide as to quantities:
| Paper Size | Approx. Flower Needed | Best For |
| 1 1/4 | 0.3–0.5g | Solo sessions, quick smoke |
| King Size Slim | 0.4–0.6g | Balanced burn, most popular default |
| King Size / 1 1/2 | 0.5–0.75g | Sharing, longer sessions |
| Emperor / Extra Large | 0.75g+ | Group sessions |
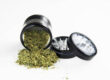
Pro tip: If you’re learning how to roll a joint, don’t leave that precious THC on your fingertips! Instead, break your flower down into an even consistency first using a simple hand grinder, one of the best (and simplest) investments you can make in superior smoking sessions.
How to Roll a Joint: Step-by-Step Instructions
There’s many variations on basic joint technique. Here, we’ll explain exactly how to roll a joint with a joint roller, a filter, or neither of these optional upgrades. But at the very least, mastering the art of rolling a basic joint is a skill that will give you years of smoking (and sharing) pleasure.
How to Roll a Joint With a Filter
The general flow goes like this:
- Grind your flower: Using either a hand grinder (or, in a pinch, a pair of clean, sharp scissors), break your flower down into small, even-sized pieces for a smooth, even smoking experience. For amounts, consult the table above.
- Set up and fold your paper: Unfold your rolling paper and place it gummy-side up on a sturdy, flat surface (we recommend an LP cover or a hardcover book).
- Place your filter: Place your filter on one end, aligning it with the short edge of the paper. You can also use a “crutch,” a 1/2” to 3/4” length of thin cardstock folded into a “W” shape to facilitate airflow and provide a solid grip.
- Fill and pack: Carefully sift the ground flower into the opened paper. Especially if you have prior cannabis experience, you can add a small amount of concentrates for a more potent infused experience.
- Roll and twist: Gently turning it between thumb and index finger, roll up your joint so that it forms a tight, evenly packed cylinder. Then lick the gummy edge of the paper to seal, making sure not to overwet the paper. For a pro-grade finish, pack the ground flower at each end with a pen or purpose-made tool before gently twisting the non-filter end shut to stop any leaks.
What It Should Look Like
A well-crafted joint looks like an even, wrinkle-free cylinder. Check for an even pack, a snugly seated filter, and no gaps at either end.
How to Roll a Joint Without a Filter
The workflow is the same as above, only minus the filter or crutch step in the middle. You might also consider employing a tighter twist at the end to give the joint a slightly more solid structure, given that one end lacks a filter.
What It Should Look Like
The overall look won’t be radically different from how you rolled a joint with a filter. Aim for an even, wrinkle-free cylinder with an even pack, no loose pockets of flower and no gaps at either end. This time, though, the joint is tightly twisted at both ends.
How to Roll a Joint With a Joint Roller
Especially if you’re just learning how to roll a joint, this simple machine makes the job a snap and can quickly kick out evenly packed, pro-style joints all day long. Here’s how it works:
- Load the ground flower: Use the same amount as before, as called out in the table
- Close the roller: Most will have a hinged cover or other mechanism to contain the flower and paper.
- Feed the paper and roll: Load the appropriately sized paper as per the above table, then work the mechanism to actually produce the joint
- Lick, seal, and twist: Being careful not to get the paper too wet, seal up the gummy edge and twist closed the open end (or ends).
What It Should Look Like
As with a hand-rolled joint, one produced with a rolling machine should have a uniform cylindrical shape, snugly rolled (but not crushed).
Pro tip: Want to see what a difference properly handled weed makes? See how Good Good’s nitrogen-sealed packaging keeps flower fresher, longer.
Best Practices to Seal a Joint

More than any other single step, this is the one that can make or break the roll. Too wet and the paper tears; too dry and it won’t hold. Here’s how to get it right the first time:
- Lick the adhesive strip only, not the full edge.
- Tuck the far side under before sealing, then press the seam evenly with your fingers.
- Give it a second to set before you spark it up.
Common Mistakes & Troubleshooting Tips
Most bad joints come down to one of a few fixable habits. Especially if you’re just learning how to roll a joint without a filter (or even with one), paying special attention to these trouble spots will help you level up quickly:
- Overpacking or underpacking
- An uneven grind
- Torn papers
- Rolling too loose or too tight
How Long Does It Take to Roll a Joint?
Speed comes with repetition, not talent. Let’s be sure to set realistic expectations here:
- Beginners: Allow several minutes and a few tries to get comfortable. Don’t get it right the first time? No big deal! Just return the ground flower to your stash box and start again with a fresh paper.
- Experienced Rollers: If you know how to roll a good joint, the entire process should take under a minute. And if you’re still building your skills, a joint roller will cut this time down even further.
Roll Up With Flower From Seed of Life Labs
At Seed of Life Labs, small-batch, hand-trimmed, lab-tested flower is at the very heart of everything we do, and it’s the essential foundation of a good joint. And now that you know how to roll one yourself, continue the journey with our deep-dive guide on how to smoke it right.
Ready to learn more? You can check out our latest drops on our live menu, or visit any of our Montana locations to see what’s new and fresh.
FAQs About How to Roll a Joint
Because this varies by paper size, there’s no one single answer. We suggest you budget 0.3g to 0.5g for an average-sized joint.
This is really a matter of personal preference. Rolling a joint with a filter can improve the airflow and structure, while rolling a no-filter joint is simpler and more traditional.
In a pinch, you can use rolled cardstock, or even a small pasta shape such as fusilli. However, purpose-made filter tips still perform the best.
Loose spots burn faster than dense ones, causing a one-sided burn. To avoid the issue in future, remember that this is almost always due to an uneven pack or grind.
Yes. Learning how to roll a joint with a joint roller yields a more consistent shape and pack while you’re building up your hand-rolling skill.